When Christmas to-do lists feel overwhelming injecting some creativity into your week can be just what your heart needs. Process Art Christmas cards are easy, playful, fun and the perfect antidote to commercial craziness.
With Christmas and New Year just around the corner this time of year can be a mash of workplace busyness, sweet treats, social catch-ups, shopping lists, budgets, New Year’s resolutions, holiday dreaming and much more. When Christmas to-do lists feel overwhelming injecting some creativity into your week can be just what your heart needs. Utilising process based methods of creating can alleviate performance pressure and provide a moment to let go, play and relax. For this activity I have combined some process based painting techniques with the Christmas giving spirit to make Christmas Cards. This activity is suitable for any age.
When making Christmas cards, I find a good variety of textured and coloured papers will set you up well. My three favourite ways to make patterned paper are paint blowing, string pulling and paint scratching and brushing. Try all of them, one of them or mix and match. The instructions for each are below followed by suggestions on how to turn the patterned paper into cards. Other process paint options include paint flicking, smudging, dribbling and marbling. There are no limits so get experimental.
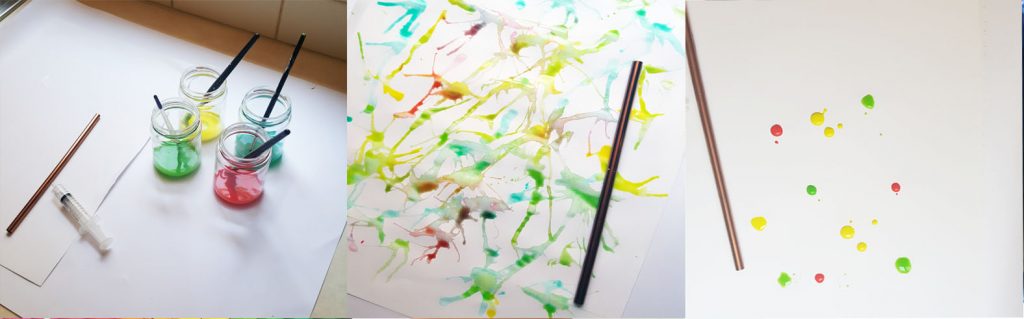
Paint Blowing:
Materials:
- Large straw (of any material)
- Liquid watercolour or watery paint
- Paintbrushes
- Paper at last 190gsm
Method:
- Lightly place drops of paint onto paper using a paint brush.
- Using the straw blow the paint so that it frays out over the surface
- Add further drops and continue as desired. You can also let dry and layer with other techniques.
Note: This activity is not suitable for people who have a suck reflex because of risk of swallowing or inhaling paint.
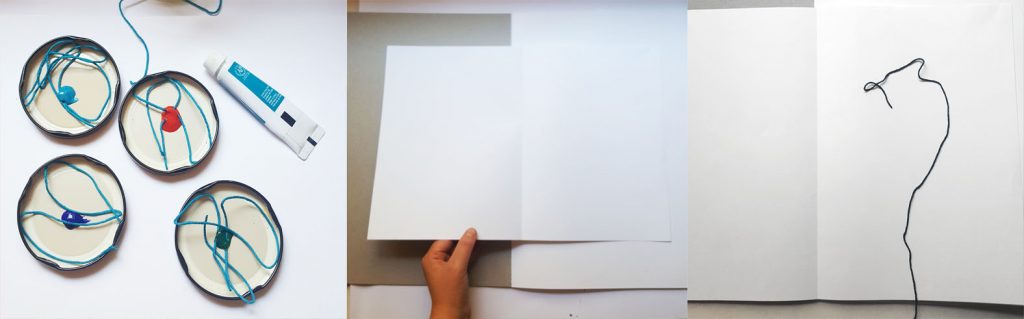
String Pull Painting
Materials
- String 6-12 inches long
- Poster, acrylic or liquid watercolour paint (I used a watercolour)
- Paper at least 180gsm
- Jars or bowls for each colour paint
- Hardcover book (I used a sketchpad)
- Gloves (optional)
Method:
- Place a small amount of paint in each jar or bowl. If the paint feels very thick add a couple of drops of water and stir.
- Cut string into lengths. Place string in paint and ensure it is well covered.
- Fold paper in half and “open” inside of cover of book
- Remove excess paint from string by running between your fingers (wear gloves if you like). Note that the process will not work as well if you don’t complete this step.
- Place string onto paper with one end overhanging the edge by 1-2cm
- Wash hands.
- Close cover of book. Use one hand to hold book and the other to pull string. It should feel firm.
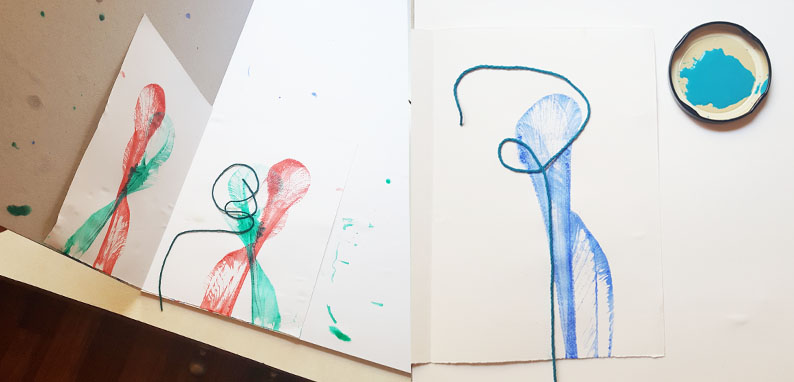
- Open to your surprise! Build with colours and layers by repeating the process
Paint Scratching and brushing
Materials
- Poster, acrylic or liquid watercolour paint
- Scratching implements (skewer, fork, various brushes, string)
- Paper at least 180gsm
Method:
- Dip your implement lightly in chosen paint
- Scratch or brush over the paper
- Experiment with different gestures
- Layer colours, washing the implement in between
All processed out? Hopefully you have had some fun and unwound. You will need to let your papers dry before continuing the next step. For the next step you will need:
- Mug or cup
- Ruler
- Lead pencil and eraser
- Glue
- Pens, fine liners or pencils
- Scissors
- Other decorative materials (optional)
- Blank card templates (or fold your own)
- Coloured and patterned papers
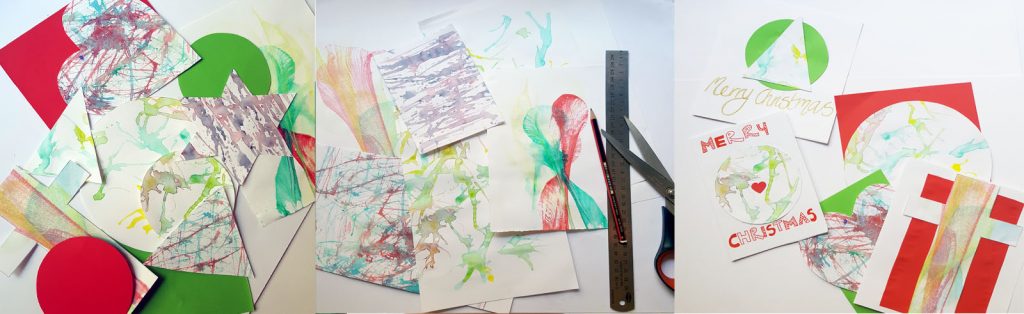
Using the pencil and implements draw the outline of shapes onto your painted paper. You can use the mug to trace a circle and ruler for straight lined stars, rectangles, triangles and crosses. Remember the shapes will be going on your Christmas cards so they need to fit. Other than that you can get as creative as you like.
You can then repeat the process and cut out shapes from your coloured paper. This step is optional but I love the layered look. Once you have a good selection begin experimenting with layout and layers of shapes on the cards. Once happy with combination and layout glue all the paper onto the card (making sure the card is the right way up).
For final touches to your Christmas cards write words, add drawn elements or other decorative touches. You can see I have started to write Merry Christmas on some of mine but otherwise kept them fairly clean. You can get as creative as you like, some of my favourite Christmas cards are the busy all-in types.
Now for the most important bit, the inside message, it’s important to not rush this step. Think of some kind and thoughtful words for the person you are writing to. Sometimes Christmas cards are the only time in the year we receive hand written sentiments. If you can, save one card and write it to a stranger. Pop it in a random mailbox, send it to an aged care facility or leave it on the street where someone might find it. Spreading a little kindness doesn’t take much.
Merry Christmas!
Do you enjoy process art? Keep an eye out for my soon to be released Create Cards featuring these process paint methods and many more activities inspired from the process of drawing, painting and sculpting freely. If you haven’t already sign up to my e-mail list at the bottom of the about page or in through the website pop up to be the first to hear.